


Marine pump maintenance means preventing flooding, bad odors, pressure drops, and sudden failures when you are far from the port. Whether it is marine pumps for bilge, for services, or for liquid transfer, a onboard pump often works in difficult conditions: humidity, vibrations, salt spray, residues, and frequent start cycles. In this guide, you will find what to check, how often to do it, and which signs indicate wear, with a practical approach oriented towards informed purchasing.
Introduction and when it is needed
A pump does not just “break”: it usually sends signals before stopping. Timely intervention reduces the risk of damage to electrical systems, furniture, and compartments. Maintenance is particularly important when:
- the boat remains stationary for a long time (condensation and deposits increase);
- you navigate in waters with sand, algae, or debris (higher risk of clogging);
- you often use the shower, sinks, or WC (more frequent cycles for the onboard pump);
- you have noticed unusual noise, dry starts, or longer emptying times (typical of the bilge pump).
From an e-commerce perspective, knowing the basics also helps you choose the correct spare parts and accessories: hoses, clamps, filters, floats, fittings, and non-return valves.
Basic concepts (how it works)
In the world of marine pumps you mainly find two families, often present together on the same boat:
Bilge pump: safety and drainage
La bilge pump used to evacuate water accumulated at the lowest points of the hull. It can be:
- Automatic (with sensor or float): activates when the level rises.
- Manual (switch): useful as a backup or for controlled emptying.
The critical point is reliability: a dirty bilge or a stuck sensor can prevent startup just when needed.
Onboard service pump: pressure and transfer
With “onboard pump” it often means the fresh water pump (autoclave) or a transfer pump for various liquids. In general:
- it sucks from the tank or an intake;
- it pushes towards utilities (taps, shower, washing) or towards a discharge point;
- works with pipes, fittings, and sometimes upstream filters.
Typical problems here are loss of priming, air suction, vibrations e too frequent ignition cycles (often related to leaks or an accumulator/pressure switch to check, if provided).
1) Identify the type of connection required
If you are considering a replacement or an upgrade, the choice should not be based solely on “visual compatibility.” Here are the most useful criteria for purchasing correctly.
1) Intended use and type of liquid
First ask yourself what the pump needs to do:
- empty bilge (water with possible residues);
- supply fresh water system (frequent cycles, stable pressure requirement);
- transfer seawater or other liquids (check material compatibility).
If you are not sure about compatibility, check the product sheet the type of allowed liquids and the possible presence of recommended filters.
2) Sizing: pipes and fittings
A high-performance pump mounted on pipes that are too small or with tight bends can perform worse than a “smaller” pump properly installed. Check:
- diameter of fittings (inlet/outlet) and compatibility with your pipes;
- length of the path and number of bends/tees;
- presence of check valve (useful in some systems, counterproductive in others if it creates pressure losses or clogs: evaluate case by case).
3) Materials and resistance to the marine environment
On a boat, corrosion and vibration resistance matter more than aesthetics. Prefer components with:
- body and screws suitable for humid/saline environments;
- gaskets and membranes compatible with the liquid;
- protected wiring and connections (where provided).
If you have doubts about specific materials, check the product sheet or ask for support before purchasing.
4) Reliability and maintenance
For a bilge pump, ease of inspection (filter/screen, cover, sensor access) is a real advantage. For a service pump, consider the availability of spare parts (membranes, gaskets, filters) and the possibility of disassembly without having to redo half the system.
Flow rate and head (practical examples)
Two words that often recur in the datasheets of marine pumps are flow rate e head. Without going into numbers (which vary from model to model), here is how to think practically.
Flow rate: how much volume you move “under ideal conditions”
The flow rate is the volume the pump can move in a certain time. In reality, the flow rate decreases if:
- the pipe is long;
- there are many bends or tight fittings;
- there is a non-return valve that introduces resistance;
- the filter is dirty or the suction is not clean.
Practical example: a bilge pump that theoretically “empties quickly” can become slow if the discharge rises very vertically or if the pipe takes a tortuous path to the transom.
Head: how “high” you can push
The head is the pump's ability to overcome a height difference and the system's pressure losses. On a boat, it matters when:
- the discharge is higher than the pump (typical of the bilge);
- the pump has to supply distant utilities (stern shower, bow wash);
- there are vertical sections and passages in bulkheads.
Practical example: if your service pump “starts but does not push” to the farthest taps, it is not always a fault: it could be a real head problem (system more demanding than expected) or air suction.
Practical rule to avoid mistakes
When comparing models, don’t look at just one data point. Consider system + accessories + pipe route. If you are replacing an existing pump, take note of:
- position and height relative to tank/sump;
- pipe diameter;
- presence of filter and valves;
- current symptoms (noise, frequent starts, slow draining).
Correct installation (steps + errors to avoid)
A good installation makes the pump last longer and reduces false problems. Below is a general scheme: for mounting and orientation details, check the product sheet.
Recommended steps
- Secure the system: disconnect power and ensure there are no accidental starts.
- Clean the area: in the sump remove residues, oil, and debris. A clean base reduces clogging and odors.
- Position correctly: the bilge pump goes in the lowest reachable and inspectable point; the service pump should be installed where it is not splashed and is accessible for filter/maintenance.
- Use suitable piping: avoid constrictions, too tight bends, and passages that crush the pipe.
- Seal and tighten well: appropriate clamps, double clamps where it makes sense, correct fittings and leak checks.
- Manage the wiring: connections protected from moisture, neat and secured passages to reduce vibrations.
- Functional test: test under real conditions (filling the sump with clean water or opening multiple outlets) and check for any leaks.
Mistakes to avoid
- Installing the pump on a dirty bottom: the filter clogs earlier and the sensor can get stuck.
- Using inconsistent diameters: sudden reductions worsen flow rate and noise.
- Create “bulges” in the discharge pipe: stagnations and water returns can often restart the bilge pump.
- Do not provide access: if to clean the filter you have to dismantle half the boat, maintenance will be postponed.
- Ignore micro-leaks: a small air intake can cause loss of priming and stress the pump.
Maintenance (frequencies and checks)
The best maintenance is simple and repeatable. Below you will find a practical routine, adjustable based on use (weekend, cruising, storage). If the manufacturer specifies specific intervals, check the product sheet and follow those.
Quick checks: often (pre-departure or weekly)
- Start test of the bilge pump (manual and automatic, if present): listen if it starts promptly and regularly.
- Visual inspection of the bilge: debris, unusual odors, presence of oil or foam.
- Leak check on fittings and hoses of the onboard pump: drops, persistent moisture, loose clamps.
- Noise: new vibrations or “hammering” can indicate air in the line or loose fastenings.
Periodic checks: monthly or seasonal (average use)
- Filter/screen cleaning of the bilge pump: remove hair, sand, algae, and residues.
- Float/sensor check: it must move freely, without encrustations or foreign bodies.
- Pipe inspection: cracks, hardening, crushing in bulkhead passages.
- Check non-return valve (if present): it must not jam or leak. If you notice frequent bilge pump starts without actual water intake, it may be a sign.
- Inspection of electrical connections: rust, looseness, infiltration. Uncertain connections increase abnormal current draw and false starts.
“Storage” or annual maintenance
- Thorough cleaning of the bilge: reduces odors and limits residues that end up in the pump.
- Disassembly and gasket check (where provided): check for hardening or cuts; if the pump is diaphragm type, check the condition of the diaphragm.
- Check fastenings: supports, silent blocks (if present), brackets and screws.
- Complete system test: simulates real conditions and checks for leaks or sudden drops.
Signs of wear not to ignore
These symptoms often precede a failure:
- Dry starts or priming difficulties (typical of the onboard pump and some transfer pumps).
- Too frequent cycles (pump starts often for a few seconds): may indicate leakage, water return or a “nervous” sensor.
- Perceived flow rate decrease: slower discharge, less “ready” taps, shower with irregular flow.
- New metallic noises or vibrations: possible play, damaged impeller, loose fastenings.
- Smell of burning or very hot pump body: stop and check immediately (blockage, stuck rotor, unstable power supply).
- Random interventions of the bilge pump: dirty sensor, stuck float, connector leaks.
Common problems and solutions (troubleshooting)
Before replacing, it is worth doing a quick diagnosis. Many problems of the marine pumps stem from installation, dirt or connections.
The bilge pump does not start
- Check power supply and switch: oxidized connections or loose cable.
- Float/sensor check: it may be blocked by debris.
- Check impeller/rotor: debris can prevent it from rotating.
If it starts manually but not automatically, the problem is often in the sensor/float or related wiring.
The bilge pump starts but does not pump (or pumps little)
- Clogged discharge hose or with too tight a bend.
- Blocked non-return valve (if present).
- Clogged filter or blocked intake.
Also check that the discharge is not partially blocked at the outlet (salt, deposits, residues).
The onboard pump makes noise and vibrates
- Air suction: loose clamps, micro-cracks in the hose, imperfect fitting.
- Rigid fastening: add or restore anti-vibration supports (if provided).
- Dirty filter: the pump “pulls” more and becomes noisier.
The onboard pump often starts for a few seconds
- Pressure loss in the system (fittings, shower head, taps).
- Flow return or valve problems (where present).
- Accumulator/pressure switch (if present): may require inspection or adjustment; check instructions in the product sheet or manual.
The pump does not stop
- Blocked sensor (bilge) or water level that keeps rising.
- Significant leak in the system (services): the pressure does not reach the stop threshold.
- Water return which makes the system “believe” it needs to keep working.
In case of continuous operation, stop and identify the cause: a pump that works nonstop wears out quickly.
Recommended products
Below you will find quick links to product types useful for maintenance, replacement, and upgrade. Compatibility depends on your system: check the product sheet diameters, connections, and intended use.
- Marine pumps (all solutions)
- Automatic bilge pump
- Manual bilge pump (backup)
- Float switches and level sensors
- Filters and screens for pumps
- Onboard pump for fresh water (services)
- Self-priming pumps for transfer
- Non-return valves and line accessories
- Fittings and adapters for piping
- Pipes for onboard systems
Recommended products
 EL/Ecoinox Pump 2/15 24v – code: 01EI124T – Gianneschi Pumps and Blowers
 EL/Pump Ecojet 2 BB, 230v 1ph, 0.55 kw – code: 01EJ2BB2 – Gianneschi Pumps and Blowers
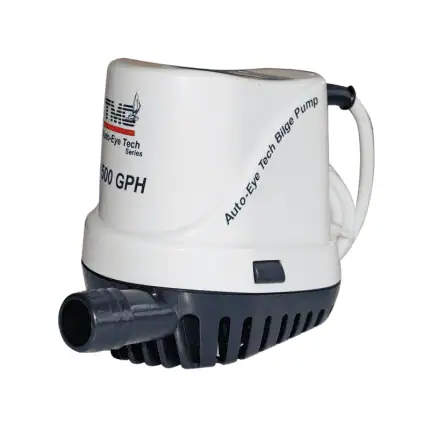 Auto Eye Tech 500 Pump, 12V – code: 1616162 – Italian Nautical Supplies
 EL/Pump Jet 4 B, 230/400v T, 50hz, 0.75 kw - code: 01J4B3 - Gianneschi Pumps and Blowers
 EL/Pump CP 30 A1, 24v, 0.45 kw – code: 01ACP301A1 – Gianneschi Pumps and Blowers
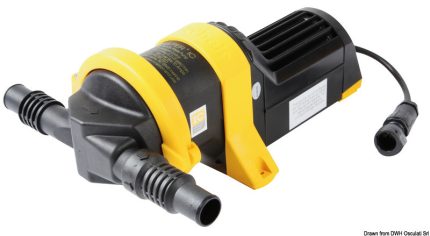 Whale Gulper IC 12 V bilge pump – code: 16.157.12 – Osculati
 Autoclave Jet 4B C.E, 24V, 0.75 kW - code: 01J4BCE1 - Gianneschi Pumps and Blowers
 EL/Pump CB 22-110, V230 M, 50/60 Hz, 1Ph, 0.55 kW 2P – code: 01CB22G222 – Gianneschi Pumps and Blowers
Useful links
To complete the system and make maintenance easier, these internal resources may also be useful to you:
- Pumps category: compare models and accessories
- Guide: how to clean the bilge and reduce odors
- Guide: fresh water system maintenance and leak detection
- In-depth: fittings and pipes, mistakes that reduce flow rate
FAQ
How often should a bilge pump be checked?
It depends on the usage and how much the bilge tends to get dirty. Basically, do a frequent start test and a periodic cleaning of the filter/screen; before long trips or after periods of inactivity, a complete check is recommended.
What are the signs that a bilge pump is sucking air?
Typical signs are irregular flow, “vacuum” noise, vibrations, and difficulty maintaining pressure. Often the cause is a loose clamp, an imperfect fitting, or a pipe with micro-cracks.
Is it always useful to install a check valve on the bilge pump?
Not always. It can help reduce water backflow in the pipe, but it also introduces resistance and can get blocked with debris. Evaluate based on the discharge path and the manufacturer's instructions: check the product sheet.
Why does the bilge pump start by itself even if no water enters?
The most common causes are dirty sensor/float, moisture or rust in the contacts, or water backflow from the discharge pipe that raises the level for a few moments.
When is it better to replace instead of repair?
If faults repeat, if you notice obvious wear of internal components, or if the pump has worked for a long time in difficult conditions (very dirty bilge, frequent starts, overheating), it is often advisable to consider a replacement. If in doubt about available spare parts, check the product sheet or ask for assistance.
Conclusion
Regular maintenance of marine pumps reduces unexpected issues and helps you navigate more peacefully: quick checks, bilge cleaning, inspection of pipes and connections make the difference. If you need to replace a bilge pump or choose a new onboard pump, explore the selection in the Pumps category Technofluid and compare models and accessories based on your system (diameters, fittings, and use): when needed, check the product sheet for compatibility.
FAQ
How often should a bilge pump be checked?
It depends on the usage and how much the bilge tends to get dirty. In practice, perform frequent start tests and periodic cleaning of the filter/screen; before long trips or after periods of inactivity, a complete check is recommended.
What are the signs that a bilge pump is sucking air?
Typical signs are irregular flow, “empty” noise, vibrations, and difficulty maintaining pressure. Often the cause is a loose clamp, an imperfect fitting, or a tube with micro-cracks.
Is it always useful to install a check valve on the bilge pump?
Not always. It can help reduce water backflow in the pipe, but it also introduces resistance and can get clogged with debris. Evaluate based on the drain path and the manufacturer's instructions: check the product sheet.
Why does the bilge pump start by itself even if no water enters?
The most common causes are dirty sensor/float, moisture or oxide in the contacts, or water backflow from the drain pipe that raises the level for a few moments.
When is it better to replace instead of repair?
If faults recur, if you notice obvious wear of internal components, or if the pump has operated for a long time under difficult conditions (very dirty bilge, frequent starts, overheating), it is often advisable to consider a replacement. If in doubt about available spare parts, check the product sheet or ask for assistance.


