Introduction and when it is needed
La bilge pump it is one of those components you hope never to notice… until it really matters. On a boat, it manages the water that accumulates in the lowest points (bilge, technical lockers, engine compartments) and helps keep the environment dry, reducing the risk of corrosion, bad odors, and damage to systems and finishes.
Many failures, however, are not due to “bad luck”: they arise from wrong choices, rushed installations, or neglected maintenance. In this guide we look at 10 typical mistakes which cause leaks, blockages, and malfunctions, with practical solutions to avoid them. You will also find selection criteria, indications on flow rate and head, and a quick troubleshooting for the most common situations.
If you are considering or replacing a pump, you can start from the category dedicated to bilge pumps and compare options based on your onboard configuration.
Basic concepts (how it works)
In common language, people talk about “pump,” but onboard there are different marine pumps with different functions. The bilge pump is designed to evacuate water (often with small debris), directing it towards a sea discharge or a dedicated drainage point.
The components that really matter
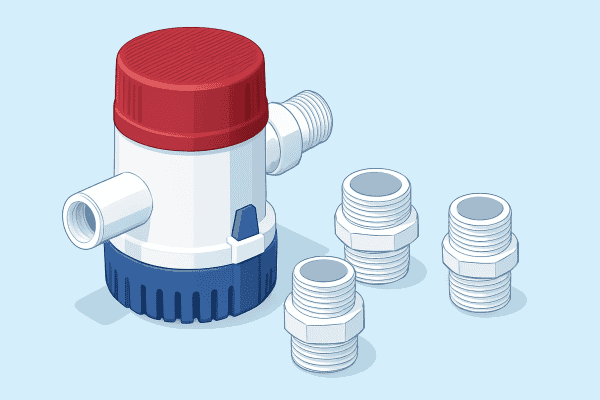
- Pump body and impeller/rotor: move the water. In some solutions the pump is submerged, in others it is external (check the product sheet).
- Filter/grate: retains larger debris and protects the hydraulic part.
- Float switch or sensor: automatically starts the pump when the level rises (if provided).
- Discharge hose: carries water to the discharge; many efficiency losses occur here.
- Non-return valve (when necessary): limits backflow into the bilge after shutdown.
- Wiring and protections: power supply, manual/automatic switch, appropriate fuse (check the product sheet).
In practice, the onboard pump works well when: water arrives without obstacles, the outlet does not create back pressure, and the electrical system ensures stable power supply.
1) Identify the type of connection required
Choosing just “any” pump is one of the most common mistakes. The correct selection starts with three questions: where will I install it, how much water do I need to dispose of e what path will the discharge take.
1) Type and configuration
- Automatic or manual pump: automation reduces the risk of forgetfulness. On many boats, a combined management (manual + automatic) is used for redundancy.
- With separate or integrated float: the separate solution facilitates sensor replacement; the integrated one reduces wiring and bulk (check the product sheet).
- Submerged or external: submersion simplifies installation in the bilge well; the external one can be useful in particular spaces or specific systems (check the product sheet).
2) Materials and environmental resistance
Humid environment, vapors, oily residues, vibrations: the pump operates in difficult conditions. Focus on materials suitable for nautical use and on a construction that allows quick cleaning of the filter. If you are not sure about compatibility with your use (freshwater, brackish water, presence of debris), check the product sheet.
3) “System” sizing, not just the pump
The pump never works alone: pipe, bends, lift height, and discharge affect the result. For this reason, it is useful to think as a system: a theoretically “powerful” pump can perform poorly if paired with an undersized discharge or a path full of restrictions.
Flow rate and head (practical examples)
Two words that generate confusion: flow rate (how much water it can move in a certain time) and head (how “high” it can push the water along the discharge). On a boat, the effective head is not only vertical: it also includes losses due to pipe length, bends, fittings, and valves.
Practical examples to understand what changes
- Short discharge and nearby outlet: the pump works under favorable conditions; often a standard sizing is enough for your boat (check the product sheet).
- Long discharge with many bends: resistance increases, actual flow decreases. Here it is better to optimize the path even before “upgrading” the pump.
- High discharge compared to the bilge: more head is needed; also watch out for backflow when the pump stops.
Operational advice: before purchasing, note lift height estimated, length of the pipe, number of bends and presence of check valve. Then compare this data with the indications reported in the product sheet.
Correct installation (steps + errors to avoid)
A well-done installation drastically reduces failures and leaks. Here you will find a simple work sequence, followed by the 10 most common errors with remedies.
Recommended steps
- Clean the bilgeRemove debris, sludge, and residues that can clog the filter and float.
- Place the pump at the lowest reachable point, on a stable base. Avoid it “dancing” with the wave motion.
- Define the discharge path: as direct as possible, with few bends and no restrictions.
- Connect piping and clamps: use correct fittings and uniform tightening; check that the pipe is not crushed.
- Install (if provided) the float/sensor: it must move freely, without hitting bulkheads or cables.
- Neat wiring: adequate protections and connections protected from moisture (check in the product sheet).
- Functional test: manual and automatic test, check for possible backflow and check for leaks on fittings.
10 errors that cause failures and leaks (and how to avoid them)
- Pump chosen without considering the actual head
Effect: the pump runs but discharges little or nothing.
Solution: calculate lift height + pressure losses (bends, length). Compare with the product sheet. - Undersized or crushed delivery pipe
Effect: reduced actual flow, overheating/fatigue, vibrations.
Solution: use recommended diameters and fittings; avoid narrow passages and sharp bends. - Poorly installed fittings and clamps
Effect: bilge leaks, air suction, sudden detachments.
Solution: check pipe/fitting compatibility, uniform tightening and clamp condition. - Check valve installed “randomly”
Effect: backflow, frequent start cycles, noise; or excessive resistance if the valve is unsuitable.
Solution: install it only if necessary and choose a model compatible with the pump (check the product sheet). Alternatively, optimize the route and discharge. - Discharge positioned unfavorably
Effect: water re-entry with rough seas or certain speeds, or back pressure.
Solution: ensure the discharge is correctly positioned and the pipe has a route that reduces backflow. - Pump not fixed or fixed on an unstable base
Effect: vibrations, wear, loosening pipes, stuck float.
Solution: use a solid and accessible fixing for maintenance. - Filter/grate ignored
Effect: blockages, blocked impeller, late interventions.
Solution: prefer solutions with an inspectable filter and regular cleaning schedule. - Float hitting cables or bulkheads
Effect: failure to start or continuous running.
Solution: leave free space around the sensor; organize cables with cable glands and fastenings. - Electrical connections not protected from moisture
Effect: oxidation, false contacts, intermittent starts.
Solution: make protected and inspectable joints; use appropriate protections and cable sections (check the product sheet). - No periodic test “in real conditions”
Effect: discover the problem when the bilge is already full.
Solution: scheduled tests: manual activation, automatic and discharge check.
Maintenance (frequencies and checks)
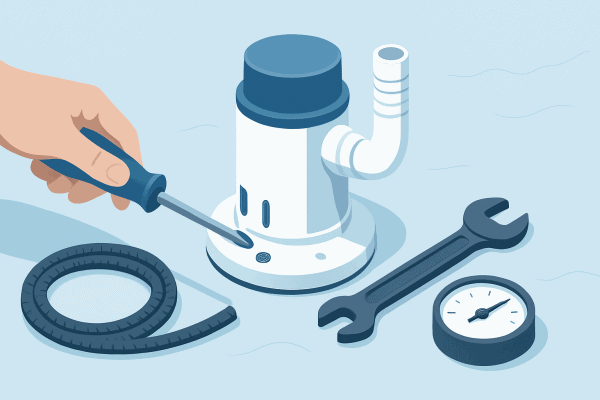
Maintenance should not be complicated: it must be constant. A bilge pump operates in an environment that accumulates dirt; just a few minutes are enough to prevent most failures.
Quick checks
- Visual inspection: water level, presence of debris, condition of cables.
- Filter/grate cleaning: remove hair, sand, fragments, fallen cable ties, etc.
- Start test: manual and automatic (if present).
- Discharge check: check that the hose is not crushed and that the clamps are tightened.
- “Abnormal” noise listening”: noises different from usual may indicate air in suction or blockages.
When to intensify checks
If you often sail in wet conditions, if the boat stays in the water for a long time, or if you notice frequent accumulations in the bilge, increase the frequency of inspections. In case of doubts about replaceable parts (impeller, sensor, filter), check the product sheet or in the manufacturer's documentation.
Common problems and solutions (troubleshooting)
When the pump does not do its job, the goal is to understand if the problem is , is a practical component for processing and assembly in the (blockage/discharge) or electric (power/contacts/sensor). This checklist helps you to intervene methodically.
The pump does not start
- Check power supply: switch, fuse, oxidized connections.
- Float bypass test: if it starts manually but not automatically, the problem may be in the sensor or its positioning.
- Check mechanical blocks: debris in the filter or pump body.
The pump starts but does not discharge (or discharges little)
- Obstruction in discharge: check hose, fittings, and any non-return valve.
- Air in the circuit: fitting that sucks air or hose that empties/fills abnormally.
- Path too “hard”: too many bends or unfavorable discharge; simplify the line.
The pump turns on and off frequently
- Backflow: water returns to the bilge after shutdown. Evaluate the path and (only if necessary) a compatible non-return valve.
- Unstable float: hits a cable or stays in a “halfway” position. Reposition and secure the wiring.
The pump stays on continuously
- Float stuck: dirt, debris, encrustations.
- Water continuously entering: even before the pump, identify the cause of the ingress (seals, through-hull fittings, condensation, showers, etc.).
If after checks the problem persists, it may be useful to replace the sensor or pump. To guide you among the options, consult the section bilge pumps and compare the compatibilities indicated on the datasheet.
Recommended products
To choose more confidently, here is a selection of useful links to related types and accessories. These are not “model lists”: they take you to pages where you can filter and compare based on your installation.
- Automatic bilge pumps
- Manual bilge pumps
- Pumps with integrated float
- Floats and level sensors for bilge
- Filters and bases for bilge installation
- Non-return valves for bilge discharge
- Bilge pump hoses and fittings
- Pump switches and control panels
- Installation kits and accessories for marine pumps
- Spare parts and components for onboard pumps
Useful links
If you want to complete the system or improve overall reliability, these links help you navigate related categories and insights.
- Category: Bilge pumps
- Guide: hoses and fittings onboard (selection and installation)
- Guide: preventing oxidation and false contacts in the electrical system
- Guide: bilge cleaning and odor prevention
- Brand: Technofluid
FAQ
Is an automatic or manual bilge pump better?
It depends on the use of the boat and how much you want to reduce the risk of forgetfulness. In many cases, the automatic pump is convenient for regular management, while the manual control remains useful as a backup. Check the product sheet to see if the pump supports combined configurations.
Is the check valve always necessary?
No. It can reduce backflow, but it also introduces resistance in the discharge line. Before adding it, consider if you can optimize the path and position of the discharge; if you install it, make sure it is compatible with the pump (check the product sheet).
Why does the pump often turn on even with little water?
Typical causes are backflow from the discharge, poorly positioned float, or vibrations that cause it to oscillate. Check the hose path, any non-return valve, and that the sensor moves freely.
How often should the onboard pump be checked?
There is no single frequency: it depends on use, environment, and bilge cleanliness. The best approach is a quick and regular check (filter, start-up, discharge) and a complete test before demanding outings or long periods of inactivity.
The pump runs but no water comes out: what should I check first?
Start with blockages and restrictions: filter, crushed hose, fittings, non-return valve. Then check for any air suction due to imperfect joints or a discharge that creates back pressure.
Conclusion
A bilge pump Reliable performance comes from three things: correct choice, clean installation, and regular checks. If you want to upgrade the system or replace a problematic pump, explore the selection of marine bilge pumps and, if you prefer to stick to a specific brand, also visit the page Technofluid: compare solutions and check the product sheet compatibility and recommended configurations for your boat.
FAQ
Is an automatic or manual bilge pump better?
It depends on the use of the boat and how much you want to reduce the risk of forgetfulness. Often the automatic manages the ordinary and the manual control remains useful as a backup. Check the product sheet to see if the pump supports combined configurations.
Is the check valve always necessary?
No. It can reduce backflow but introduces resistance on the delivery side. First optimize the path and position of the discharge; if you install it, make sure it is compatible with the pump (check the product sheet).
Why does the pump often turn on even with little water?
Common causes: backflow from the delivery, improperly positioned float or vibrations causing it to oscillate. Check the tube path, any non-return valve, and that the sensor moves freely.
How often should the onboard pump be checked?
There is no single frequency: it depends on usage, environment, and bilge cleaning. It is better to perform quick and regular checks (filter, start, delivery) and a complete test before demanding outings or long periods of inactivity.
The pump runs but no water comes out: what should I check first?
Check for blockages and restrictions: filter, crushed tube, fittings, and non-return valve. Then check for possible air intake from imperfect joints or discharge back pressure.