Introduction and when it is needed
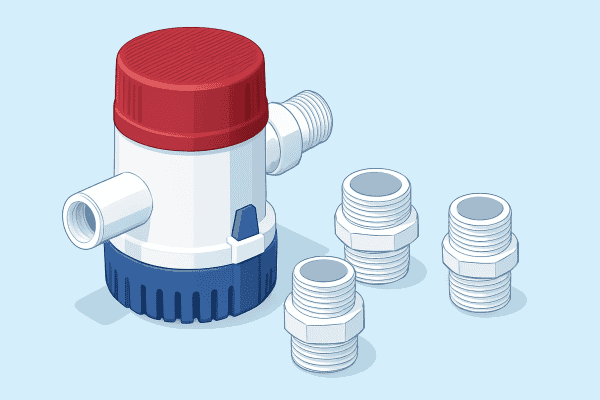
The bilge pump is one of those components that go unnoticed… until it really matters. Its task is simple: to help manage the water that accumulates in the lowest points of the boat, keeping the bilge drier and reducing the risk of onboard issues. Precisely because it works “behind the scenes,” it tends to be neglected, but regular maintenance is often the difference between a quick check and a problem that arises at the worst possible time.
In this article you will find a practical guide on what to check, how often to do it, and what are the most common most common ones. The focus is informative, but with an e-commerce approach: when it makes sense to replace a component, we indicate what to consider and where to learn more in the product sheet.
When is it time to intervene?
- Before the season starts, or before a long cruise.
- After periods of inactivity (storage, prolonged inactivity).
- If you notice more water in the bilge than usual or persistent odors.
- If the pump runs often without apparent reason (abnormal cycle).
- After heavy rains, deck washdowns, or known leaks.
Basic concepts (how it works)
In common language, people talk about the “onboard pump,” but in reality, different marine pumps with different functions (freshwater, gray water, washing, etc.) can coexist onboard. The bilge pump is dedicated to evacuating water from the bilge to a drain, usually through a hose and a dedicated sea intake/drain (the configuration varies depending on the boat).
Typical elements of a bilge system include:
- Pump body (often centrifugal in the most common versions): pushes water toward the outlet.
- Filter/strainer: limits the entry of debris that can block the impeller or suction.
- Float switch or sensor: activates the pump when the level rises (in some systems it is integrated, in others separate).
- Discharge hose: conveys water to the drain; bends and restrictions affect performance.
- Electrical supply and protections: wiring, connections, fuses/switches.
The basic logic is: when water exceeds a certain level, the automatic control starts the pump; when the level drops, the pump stops. If something in this chain does not work (sensor, power supply, hose, blockage), the system loses effectiveness.
1) Identify the type of connection required
If you are considering a replacement or upgrade, the choice of pump should not be based only on the perceived “size.” A bilge pump should be chosen considering the system, use, and working environment. Some useful criteria:
Type and configuration
- Automatic pump (with integrated sensor) vs pump with separate floatthe second solution can facilitate maintenance and replacement of the control only.
- Submersible pump vs non-submersible installations: the choice depends on layout and accessibility. Check the product sheet for the expected configuration.
Compatibility with the system
- Alimentazione and type of connection: check voltage, current consumption, and if specific connectors are required (check the product sheet).
- Connection diameter and compatibility with existing pipes: adapters and reducers can introduce efficiency losses.
- Available space in bilge: consider size and ease of removal for cleaning.
Materials and resistance
The bilge is a harsh environment: humidity, vapors, oily residues, sand, small debris. Prefer materials and finishes designed for marine use. “More robust” does not always mean “more suitable”: ease of filter disassembly and quality of connections also matter. If in doubt, check the product sheet the declared materials and recommended use.
Redundancy and operational safety
On many boats it makes sense to have more than one solution: a main pump and a backup, or an emergency manual control. The choice depends on the type of navigation and usage habits, but the principle is simple: if one component fails, the other can reduce the risk of uncontrolled accumulation.
Flow rate and head (practical examples)
When talking about marine pumps, two concepts always come up: flow rate (how much water it can move) and head (how “high” or with how much resistance it can push). No need to get into formulas: just remember that the declared flow rate is often based on ideal conditions, while on the boat the pipe route and losses matter a lot.
Practical examples of what reduces effectiveness
- Long pipes and with many bends: each bend is a resistance.
- Chokes (over-tightened clamps, narrow passages, improvised reductions).
- Height difference between pump and discharge point: more “lift” means more effort.
- Valves or unsuitable fittings: they can create turbulence and leaks.
- Debris in the filter: even a partial blockage changes everything.
How to reason without making mistakes
If you want to avoid “gut feeling” choices, do this:
- Observe the path of the tube: length, bends, any uphill sections.
- Check the diameter of the tubes and fittings.
- Evaluate accessibility: a pump that is easy to clean maintains performance better over time.
- When comparing models, consider that the real system can reduce efficiency: check the product sheet usage instructions and operating curves if available.
Correct installation (steps + errors to avoid)
A good pump installed poorly can become unreliable. Here you find a general guideline: for details on connections and compatible accessories, always refer to the product sheet and your boat’s configuration.
Recommended steps
- Clean the bilge before installing or reinstalling: residues and sludge shorten the system’s life.
- Place the pump at the lowest useful point, on a stable base, avoiding it “rocking” with the waves.
- Secure the filter and check that it is easily removable for maintenance.
- Route the piping with wide bends and no constrictions; fix the tube to avoid rubbing.
- Check the electrical connections: clean crimps, adequate insulation, passages protected from moisture.
- Functional test: test both automatic mode (float/sensor) and manual mode, if present.
Common mistakes to avoid
- Leaving the filter clogged or inaccessible: maintenance becomes impossible and the pump works poorly.
- Reduce the diameter of the tube “to adapt it”: often it is a loss of efficiency.
- Exposed wiring to stagnation: oxidation and false contacts are just around the corner.
- Weak fastenings: vibrations and shocks can loosen fittings and cause leaks.
- Relying only on the automatic without periodic tests: the failure is discovered when it is too late.
Maintenance (frequencies and checks)
Maintenance of the bilge pump is not a one-time operation: it is a set of quick checks and targeted cleanings. The goal is to prevent three typical problems: blockages, failure to activate and loss of efficiency.
How often to check
- Quick visual inspection: regularly during the season (more often if you sail in dirty waters or if the bilge tends to get dirty).
- Functional test: periodic, especially before long outings or after heavy rain/deck washdowns.
- Filter and surrounding area cleaning: when you notice residues, sand, hair/fibers or when the pump seems to “struggle”.
- Connection overhaul: at the beginning of the season and after storage.
The exact frequency depends on the boat and usage: if the bilge remains clean and dry, checks can be quicker; if you often find water, it is advisable to increase the routine.
Maintenance checklist (practical)
- Filter/strainer: remove and clean; check that it is not deformed or broken.
- Pump inlet: check that there are no trapped debris.
- Impeller/rotor (if accessible): check that it spins freely and shows no obvious signs of wear.
- Float or sensor: test the activation; make sure it is not blocked by dirt or cables.
- Delivery hose: check for folds, cracks, abrasions, and clamps.
- Electrical connections: look for oxidation, looseness, leaks; restore insulation if necessary.
- Drain test: check that the water is actually expelled and does not flow back.
Signs of wear not to ignore
Some symptoms are real “warning signs”:
- Frequent and short starts: may indicate water backflow, dirty sensor, or micro-leaks.
- Abnormal noise or vibrations: possible internal debris, damaged impeller, or unstable mounting.
- Pump runs but does not drain: blockage, bent tube, priming problem (depends on model), or leak in the circuit.
- Intermittence: oxidized contacts, worn wiring, defective float.
- Smell of burning or noticeable overheating: stop and immediately check power supply and pump conditions.
Common problems and solutions (troubleshooting)
Here is a quick “mental” table: symptom, probable causes, and what to do. If after basic checks the problem remains, it is advisable to consider replacing the pump or the control, choosing compatible components (check the product sheet).
The pump does not start
- Possible causes: fuse/switch, oxidized connections, stuck float, no power supply.
- What to do: check power supply and wiring, clean/release the float, verify that contacts are dry and tight.
The pump starts but does not drain water
- Possible causes: clogged filter, debris at the inlet, bent or blocked tube, loose fitting.
- What to do: clean filter and inlet, inspect the tube along the entire path, restore wide curves and correct clamps.
The pump stays on continuously or runs constantly
- Possible causesStuck float, dirty sensor, water backflow, constant bilge infiltration.
- What to doClean and free the control, check the discharge path and assess if there is a point where water re-enters; also check for possible water ingress in the bilge.
Weak or irregular discharge
- Possible causesHigh pressure losses (bends, reductions), internally worn pipe, partial blockages, tired pump.
- What to doOptimize the pipe route, replace hardened or cracked pipes, clean thoroughly; if the problem persists, consider a replacement with a model more suitable for the system.
Recommended products
To help you with your search, below you will find quick links to useful types and accessories. These are not SKU lists: they are shortcuts to pages where you can filter and compare. For compatibility and technical details, check the product sheet.
- Bilge pumps: complete selection
- Automatic bilge pumps
- Manual and emergency bilge pumps
- Float switches and level sensors
- Discharge hoses and bilge piping
- Fittings and clamps for onboard systems
- Switches, panels, and controls for onboard pumps
- Cables, connectors, and nautical electrical accessories
- Filters, grilles, and accessories for pump protection
- Marine pumps: other onboard applications
Useful links
If you are doing a complete system check, these links will help you continue with a “concentric circles” maintenance: first the pump, then hoses, electrical, and accessories.
- Bilge pump category
- Marine pump category (overview)
- Guide: pre-departure checks on onboard systems
- Guide: how to choose hoses and clamps for marine systems
FAQ
How do I know if the bilge pump needs to be replaced?
If after cleaning the filter, checking the hose, and verifying connections the pump still does not discharge well, starts intermittently, or shows recurring abnormal noises, it is often more sensible to replace it. In case of doubt, compare the symptoms with those indicated in the product sheet and also assess the condition of the float.
Is it better to have an automatic pump or a separate float?
It depends on accessibility and maintenance habits. The separate float can make it easier to replace only the control in case of failure, while the integrated automatic reduces external components. Check in the product sheet how automation is managed and how the test is performed.
Why does the pump often start even if it’s not raining?
The most common causes are: dirty or stuck sensor/float, water backflow from the discharge pipe, or a small constant infiltration (seals, passages, sinks, condensation). Start by cleaning the control and checking the pipe route.
Can I use the bilge pump to empty other compartments?
In general, it is preferable that the bilge pump remains dedicated to its task, to avoid residues and debris putting it out of order when it is really needed. If you need to manage other emptying tasks, consider a second dedicated onboard pump or a separate system, compatible with the intended use (check in the product sheet).
What should I check after storage?
Before putting the boat back in the water: bilge cleaning, filter and pump inlet, float/sensor test, inspection of hoses and clamps, check for oxidation on electrical connections, and manual/automatic start test. It's also a good time to assess whether the onboard marine pumps match your current usage.
Conclusion
A simple but consistent maintenance of the bilge pump reduces sudden failures and allows you to navigate more peacefully: filter cleaning, automatic control test, inspection of pipes and connections are the four pillars. If you need to replace the pump or complete the system with compatible accessories, visit the bilge pump category on Technofluid: you will find solutions for different configurations of onboard pump, spare parts and components useful to keep the system efficient over time.
FAQ
How do I know if the bilge pump needs to be replaced?
If after cleaning the filter, checking the tube, and verifying the connections the pump still does not drain properly, starts intermittently, or has recurring abnormal noises, it is often advisable to replace it. Also evaluate the condition of the float/sensor and compare the indications on the product sheet.
Is it better to have an automatic pump or one with a separate float?
It depends on the installation and maintenance: the separate float can facilitate the replacement of only the control, while the integrated automatic reduces external components. Check the product sheet to see how the automation is managed and how the test is performed.
Why does the bilge pump often start even without rain?
Common causes: dirty or stuck sensor/float, water backflow from the drain pipe, or small constant leaks (seals, passages, condensation). Start by cleaning the control and checking the discharge path.
Can I use the bilge pump for other onboard drainings?
Better to keep it dedicated to the bilge to reduce the risk of clogging when it really matters. For other uses, consider a separate onboard pump suitable for the purpose; check the product sheet for compatibility of use.
What to check on the bilge pump after storage?
Clean bilge and filter, check pump inlet, test float/sensor, inspect hoses and clamps, check electrical connections for oxidation, and perform a manual/automatic start test before departure.